Let's be honest: buying those pre-packaged containers of sprouts at the grocery store always feels like a gamble. Are they fresh? Why do they look so sad? And why are they so expensive for something that is essentially a bean with a ponytail?
Growing up in an Indian household, sprouts weren't a "health trend"—they were a staple. Whether it was a quick Moong Dal Chaat after school, a spicy Moth bean curry (hello, Misal Pav!), or just a handful of sprouted Chana with fresh coconut and nuts, these little powerhouses were everywhere.
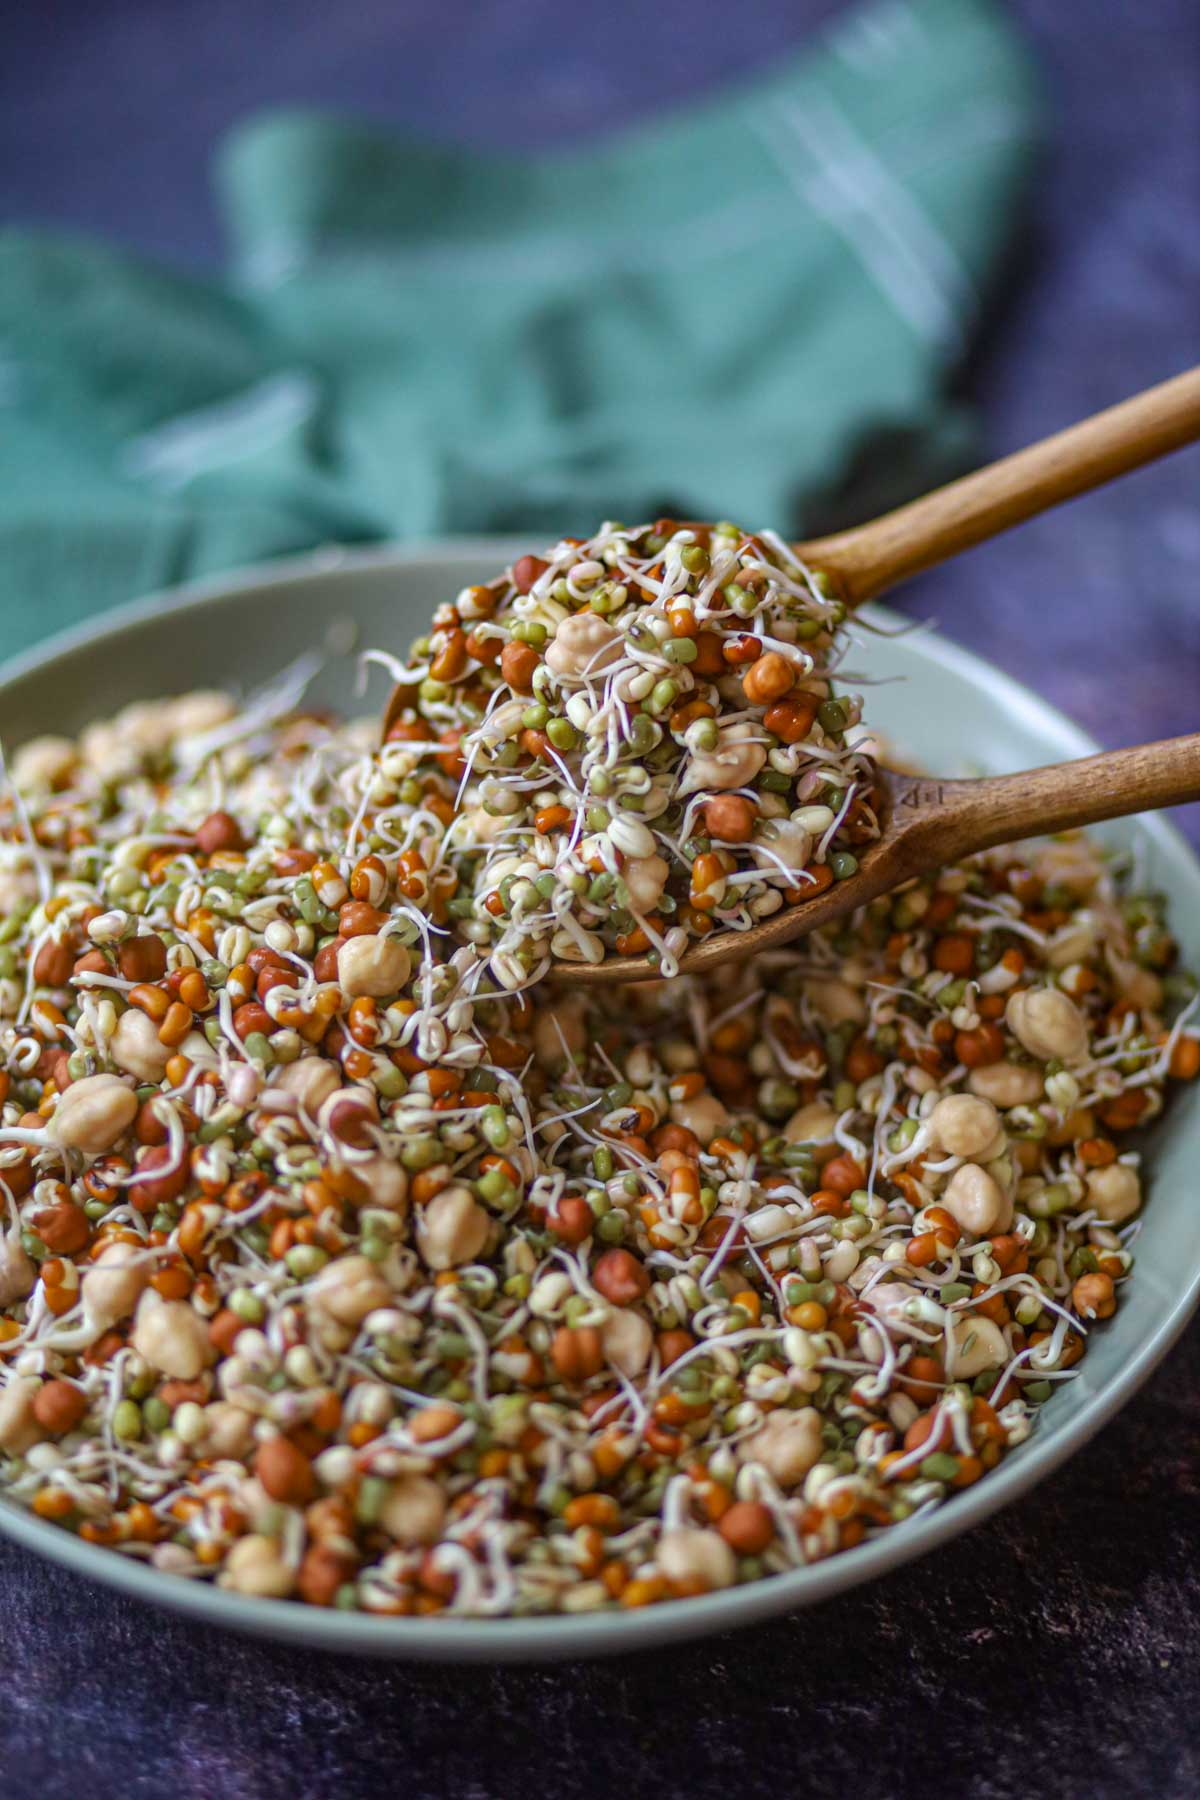
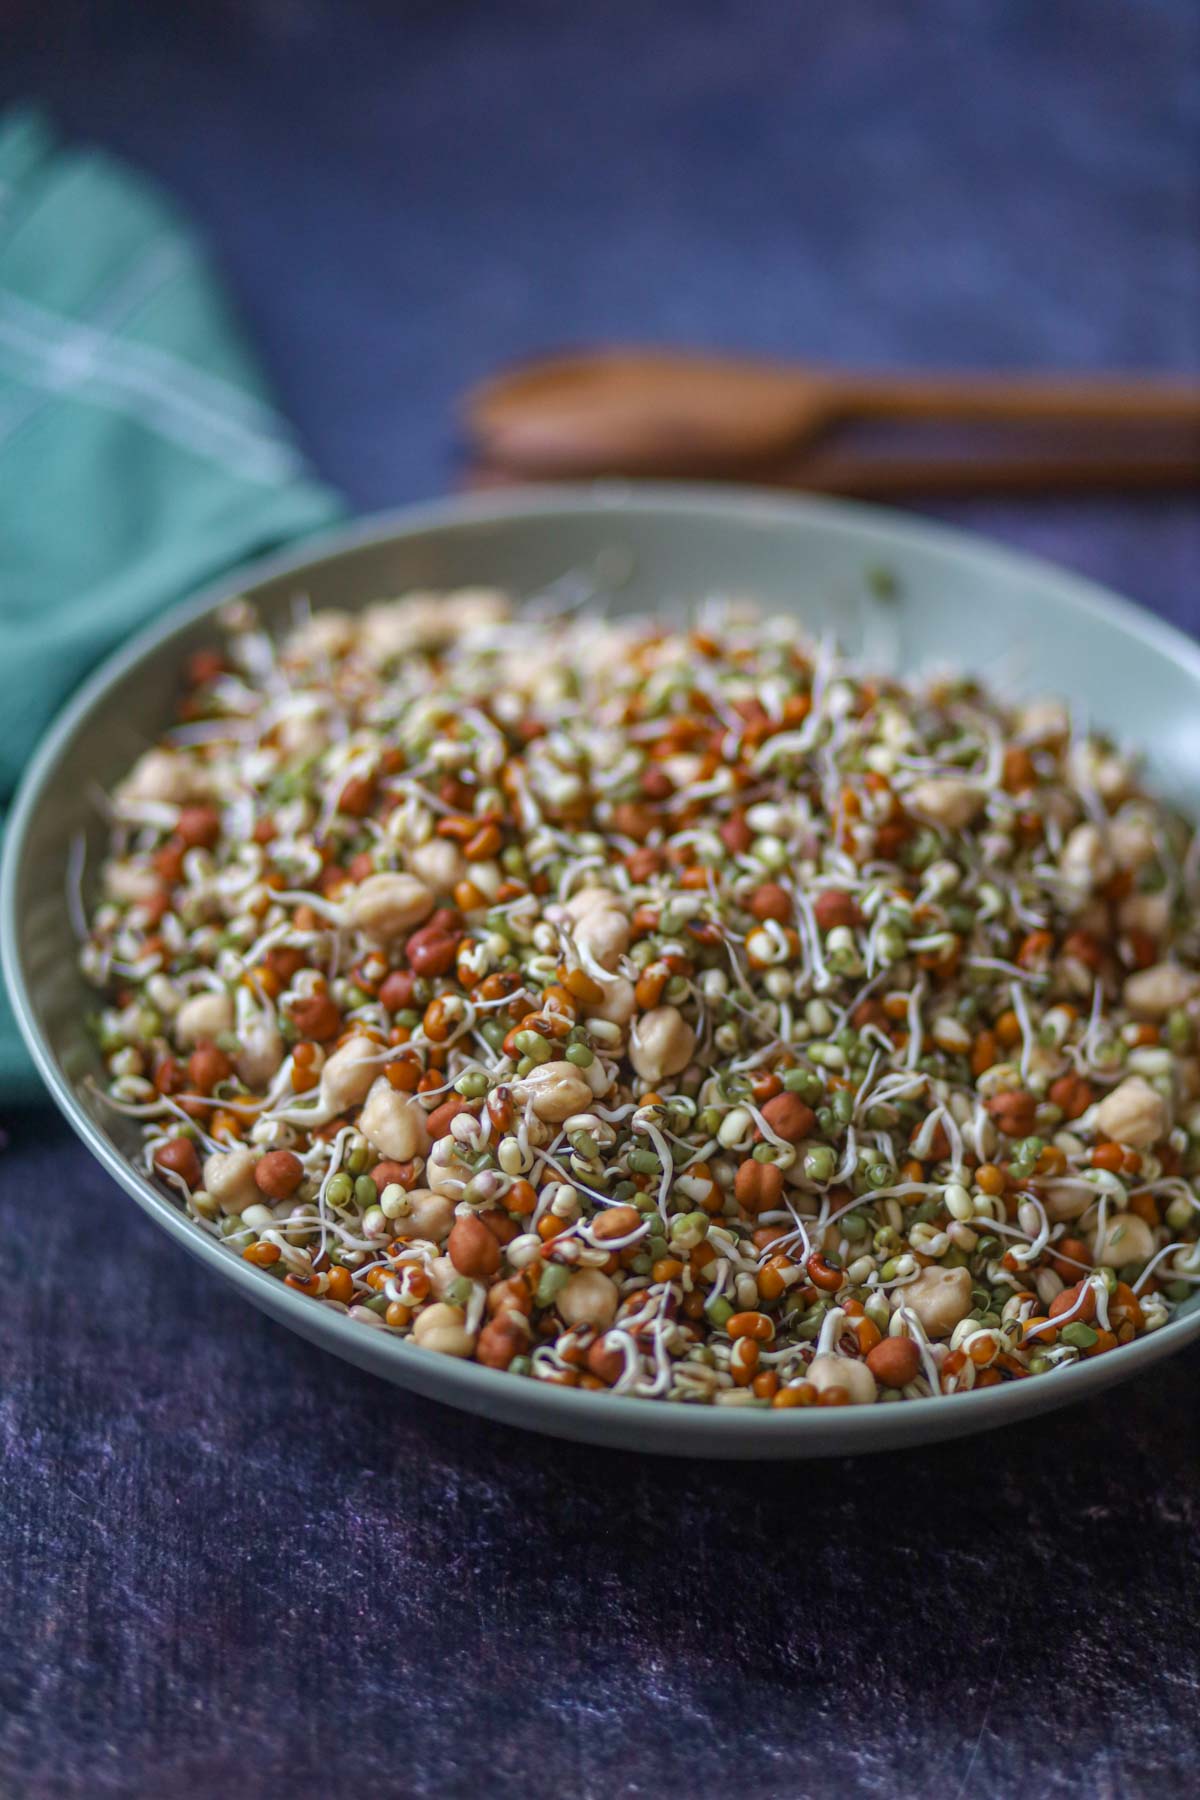
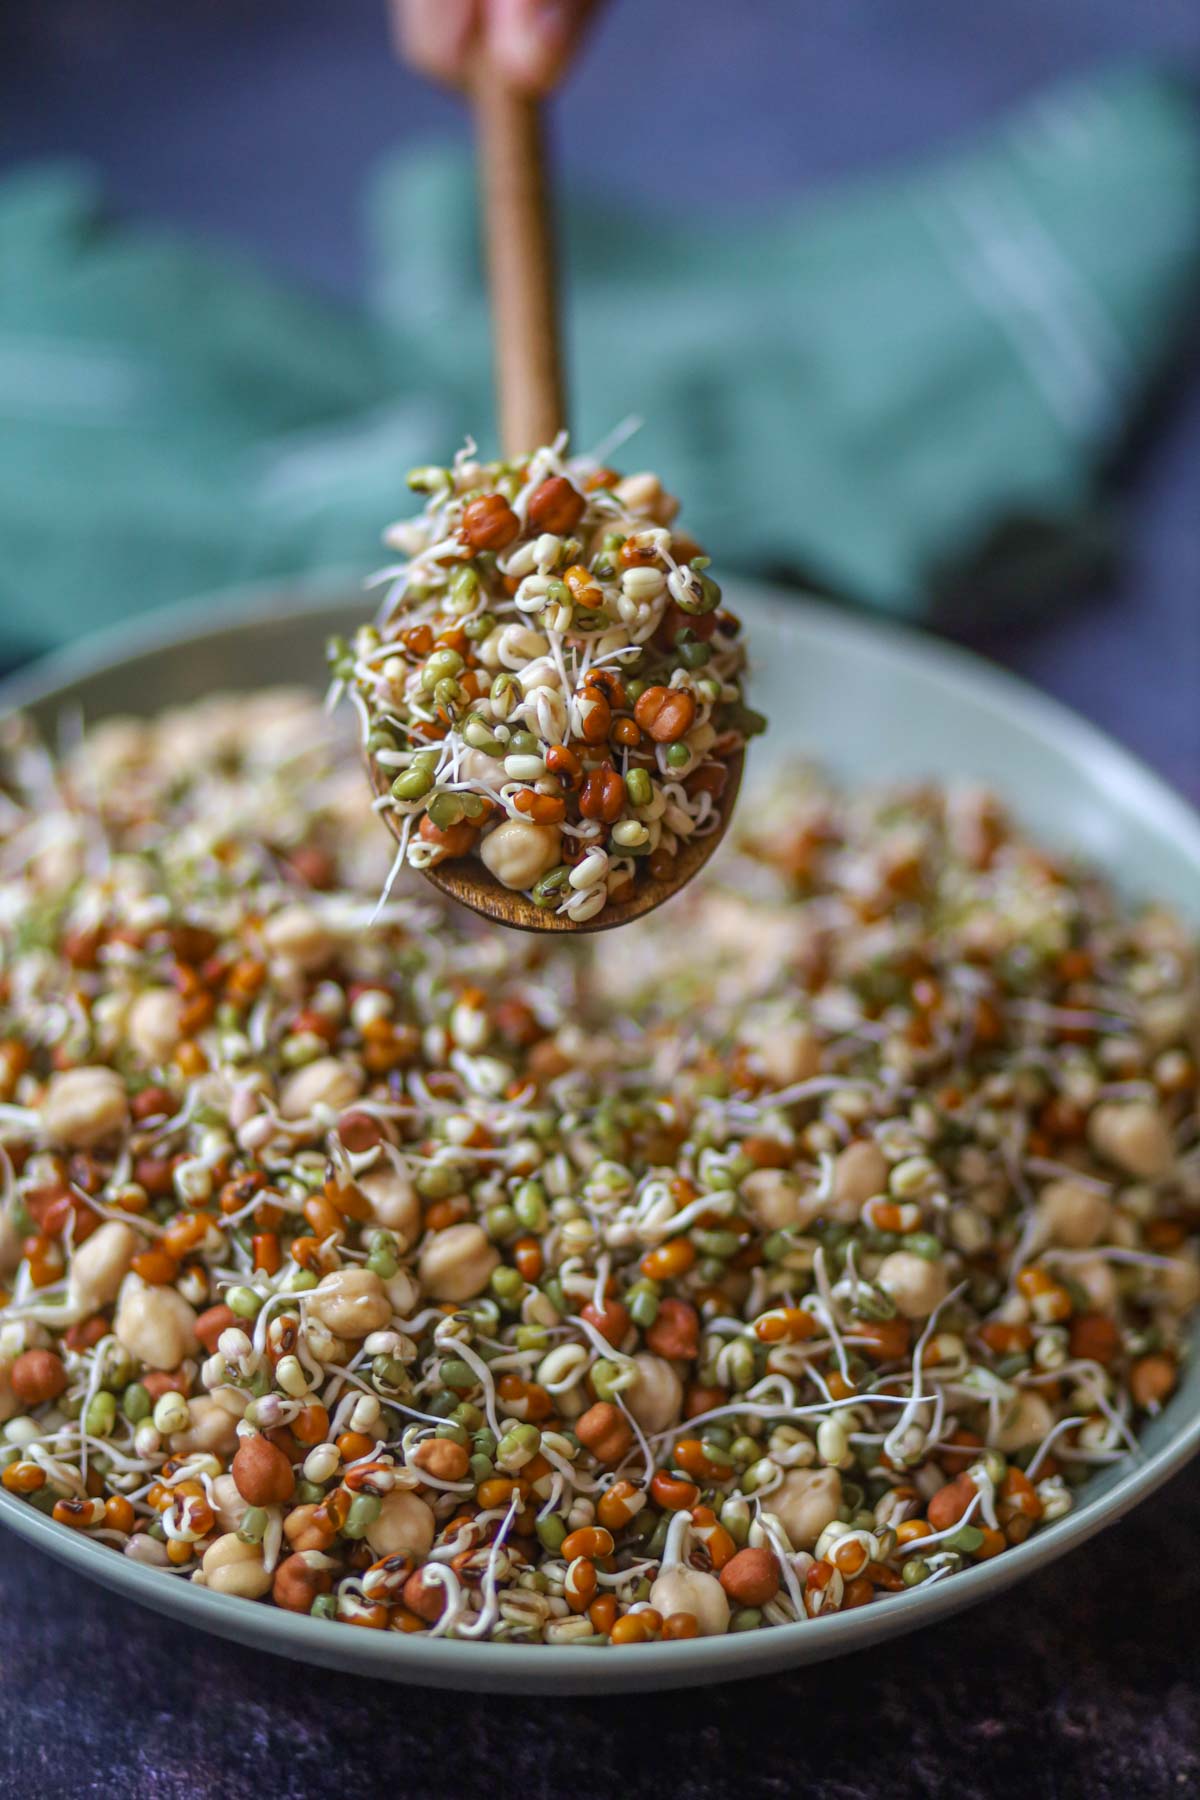
If you've tried sprouting before and ended up with a smelly, slimy mess—don’t give up! Today, I'm showing you my foolproof, "ultimate way to sprout four popular beans: moong, moth, black chickpeas, and White Chickpeas (Kabuli Chana).
Quick Guide: How to Make Sprouts at Home
- Soak the beans: Moong or moth beans: 8 hours, and Chickpeas: 12–15 hours
- Drain and rinse well.
- Keep in a warm place in a jar or bowl with airflow.
- Rinse once or twice daily.
- Sprouts appear in 24–48 hours.
Meet the "Big Four": From the Overachievers to the Late Bloomers
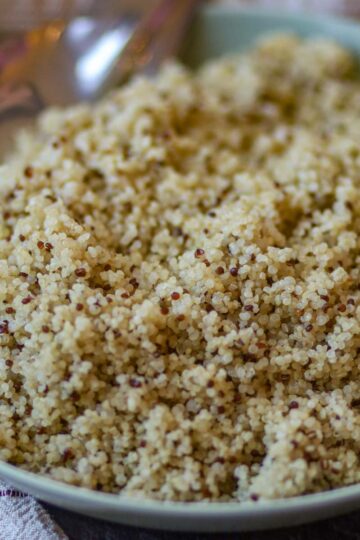
In my kitchen, I've learned that every bean has its own personality. I have chosen these 4 types of legumes- not just for their flavor but for their incredible Legume bioavailability. For a complete nutritional powerhouse, I love mixing these sprouts into a Lentil and Quinoa Protein Bowl.
You can't treat a stubborn chickpea the same way you treat an eager moong bean. Here's what you can expect when sprouting these legumes at home.
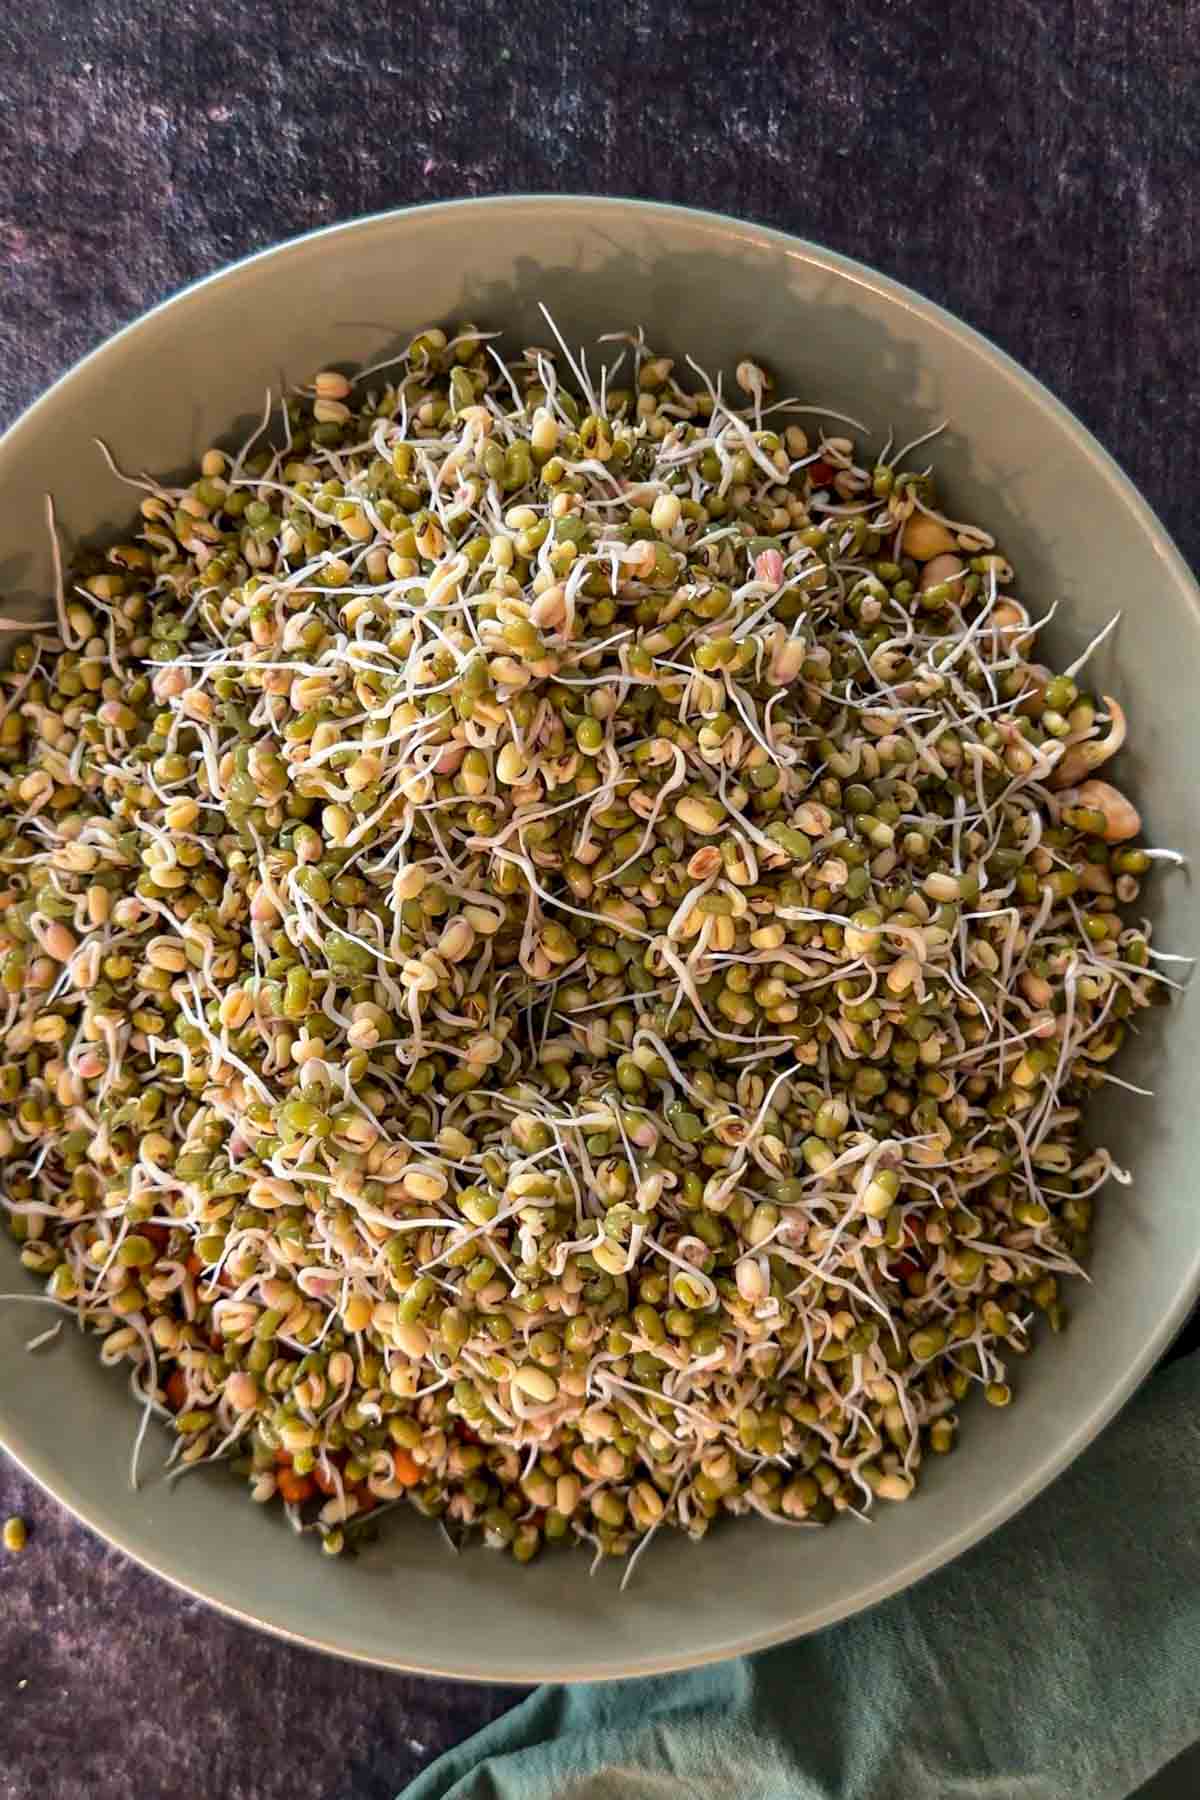
- Moong Dal (Green Gram): The Overachiever. Moong beans are the easiest sprouts to grow. Moong is the student who finishes the exam 20 minutes early. These start popping little white tails almost the moment you look away.
- Moth Beans (Matki): The Earthy Soul. Small but mighty. They sprout into delicate, nutty curls that are the backbone of rustic Indian cooking. In fact, these delicate curls are the star ingredient in my authentic Misal Pav recipe, where they soak up a spicy, flavorful rassa.
- Black Chickpeas (Kala Chana): The High-Fiber Champion. These are the heavyweights. They have a tough exterior, but once they "wake up," they provide a fantastic, meaty bite.
- White Chickpeas (Kabuli Chana): The Drama Queen. I'll be honest—these are the divas. Because they are so starchy, they can get "moody" (read: smelly or bubbly) if they aren't rinsed enough. They need a little extra love, but the buttery reward is worth it.
Beyond the crunch, the real magic is that sprouting can help to break down anti-nutrients such as phytic acid, allowing your body to absorb minerals like iron and zinc much more effectively.
The Basic Science of Sprouting (Soak, Rinse, Drain)
Before we get to the hacks, we have to respect the process. Every bean follows the same three-step mantra: Soak, Rinse, and Drain.
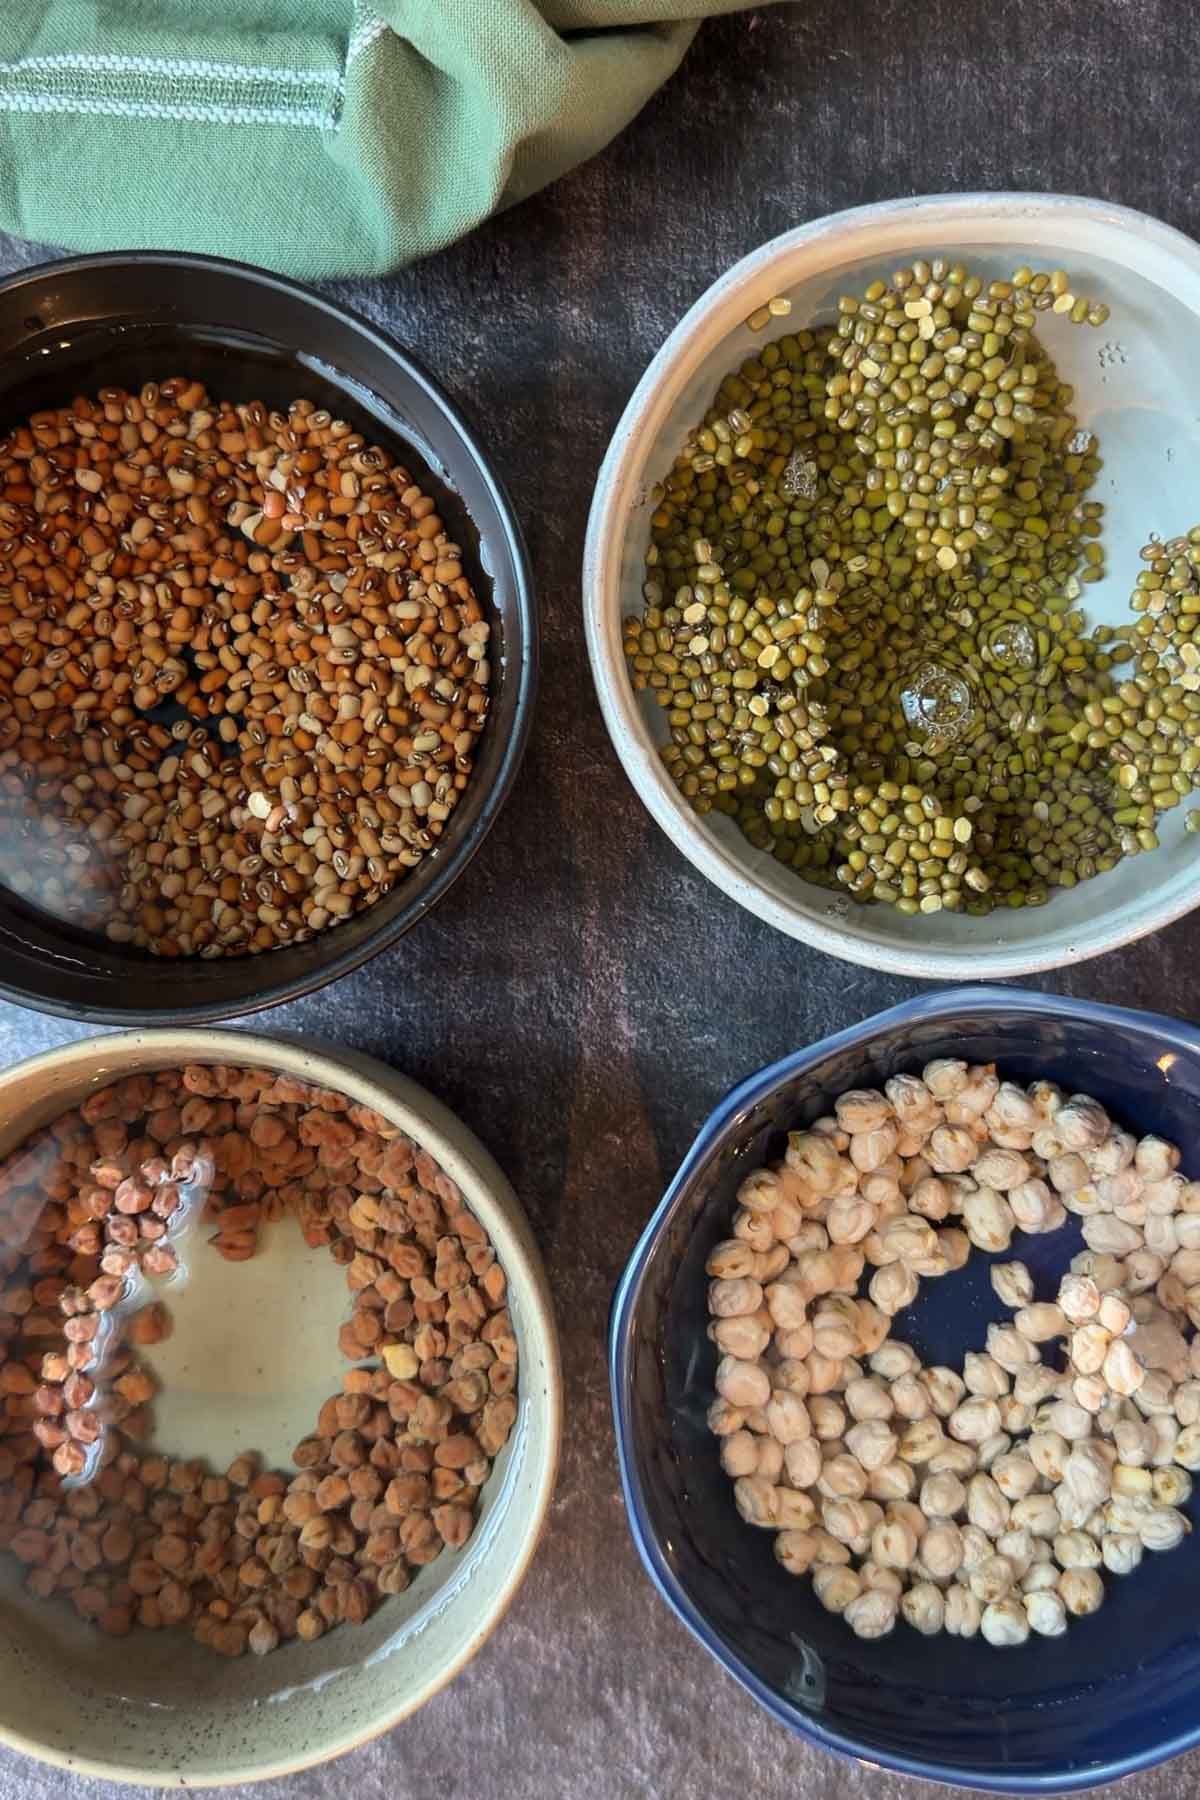
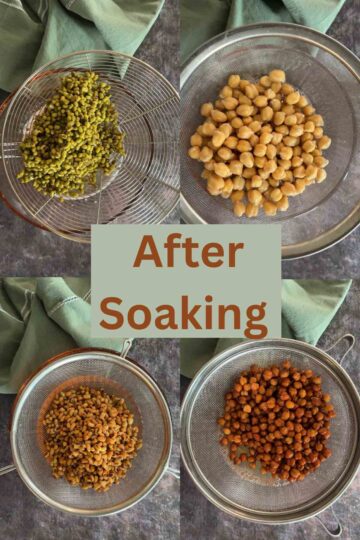
Step 1: Soak the Beans
Start by soaking your beans in filtered water.
Recommended soaking times:
- Moong Beans: 8 hours
- Moth Beans: 8 hours
- Kala Chana: 12–15 hours
- Kabuli Chana: 12–15 hours
Soaking softens the beans and activates seed germination.

Step 2: Rinse the Beans
After soaking, drain the water and rinse the beans well. This step gives your beans fresh oxygen and removes starch buildup, which helps prevent bad smells. Rinse your beans 1–2 times per day while they are sprouting.

Step 3: Drain Completely
This is where most people make mistakes. If beans sit in standing water, they won't sprout — they'll ferment or rot. Make sure your beans are well-drained before placing them back in the jar or bowl. Think of it this way: sprouts need moisture, not swimming pools.
Storing the jar at a 45-degree angle in a bowl is the best way to ensure every drop of water escapes while allowing air to circulate.
Step 4: Final Harvest
Mix all the sprouts in a bowl until well combined. And store the sprouts in an air-tight container.
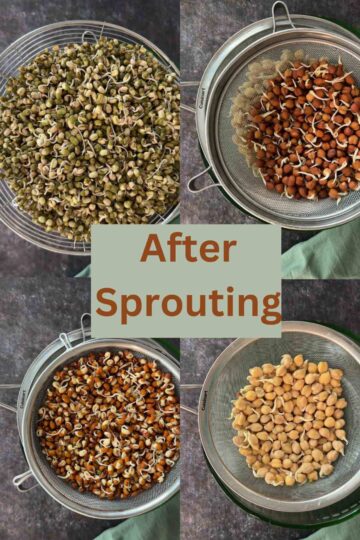
How Long Do Sprouts Take to Grow?
Typical sprouting times:
| Beans | Sprouting Time |
| Moong Beans | 24-36 hours |
| Moth Beans | 24-36 hours |
| Kala Chana (Black Chickpeas) | 36-48 hours |
| Kabuli Chana (White Chickpeas) | 48 hours |
Warmer kitchens promote faster sprouting, while colder kitchens slow it down.
My "Too Cold to Sprout" Hacks ❄️
If you live in a chilly place, your kitchen counter might be too cold for germination. Here are two tricks that work beautifully:
1. The Oven Light Trick
This is my favorite low-tech hack. Place your jar in the oven (with the oven OFF). Turn on only the oven light. That tiny bulb creates a warm environment (around 75-80°F/25 °C) that is perfect for germination.
2. The Instant Pot "Incubator" Method
If you're in a hurry, use your Instant Pot!
- Place your soaked and drained beans in a bowl inside the IP.
- Close the lid (vent-to-venting).
- Press Yogurt (Low setting) for 8-12 hours. It creates a warm, stable environment that encourages fast sprouting.
Should You Eat Sprouted Chickpeas Raw?
Before you take a giant bite of those beautiful sprouted chickpeas, let's have a quick chat. While Moong and Moth are delicate and crunchy, the Chickpea brothers (Black and White) are much sturdier.
They might be 'drama queens' to grow, but the payoff is huge because germination effectively reduces anti-nutritional factors in chickpeas, which is why they feel so much lighter on your stomach than regular canned beans.
If you don't like the "raw" earthy taste or find them too hard for your teeth, don't force yourself to eat them raw. Here are three quick options:
- The 2-Minute Blanch: Toss them into boiling water for 2-5 minutes. They’ll soften slightly while still staying crunchy.
- The Steam: Steam for 5 minutes to make Kabuli Chana softer and easier to chew.
- Pressure Cook: If putting them in a curry, give them one whistle in a pressure cooker or 2 minutes in the IP.
Common Mistakes (The "What Was I Thinking?" List)
If your sprouts turned into a smelly science experiment, don’t worry — almost everyone makes these mistakes when learning how to make sprouts at home.
Here are the most common ones and how to avoid them.
- The "Puddle" Problem: Leaving just a tablespoon of water at the bottom of the jar. This is the #1 cause of rot. If the beans sit in water after soaking, they won’t sprout — they’ll start fermenting instead. Always drain them well after rinsing.
- Using Hot Water: Thinking warm water will "speed things up." It actually cooks the enzymes and kills the sprout before it starts.
- Crowding the Jar: Beans need air circulation to sprout properly. Fill the jar more than ⅓ full with dry beans. Remember, they swell up to 3x their size! They need room to breathe. 1 cup of dry beans yields roughly 3 cups of sprouts.
- The "Set it and Forget it" Fallacy: Beans release natural starch during sprouting. If you don’t rinse them regularly, they can develop a sour smell. Rinse your sprouts once or twice a day with fresh water. This keeps them clean and encourages healthy sprouting.
- Keeping Them in a Cold Kitchen: Sprouting is basically seed germination, and seeds like warmth. If your kitchen is cold, the beans may just sit there doing nothing. Try either the oven method or the Instant Pot method. Both create a warm environment that sprouts love.
Troubleshooting
Sprouting is simple, but small things like temperature, rinsing, and airflow can affect the results. While home sprouting is rewarding, it's important to follow basic hygiene practices for selecting and serving sprouts safely to avoid any risk of foodborne illness.
| If you see/smell this... | It likely means... | The Fix |
| Sour or fermented smell | Not enough rinsing or too much heat. | Rinse 3x a day with cold water. If it’s really bad, toss it. |
| Slimy texture | Poor drainage or lack of airflow. | Use a mesh lid and keep the jar at a 45-degree angle. |
| Brown/dark tips on tails | They are thirsty or "over-cooked." | Harvest them immediately and move to the fridge. |
| No tails after 2 days | Old beans or "dead" seeds. | Check the "expiry" or "packed on" date on your bean bag. Export to Sheets |
Storage
Once your sprouts have grown to the length you like (usually a small white tail), it’s time to move them to the refrigerator. This slows down the sprouting process and keeps them fresh.
Step 1: Dry the Sprouts
Before storing, make sure the sprouts are well-drained. Excess moisture can cause them to spoil faster.
You can spread them on a clean kitchen towel for a few minutes to remove extra water.
Step 2: Use an Airtight Container
Transfer the sprouts to a clean airtight container and place them in the refrigerator.
A glass container works especially well because it keeps moisture and odors under control.
Step 3: Refrigerate Immediately
Store sprouts in the main section of the refrigerator, not the door. The consistent temperature helps keep them fresh longer.
How Long Do Sprouts Last?
Homemade sprouts usually stay fresh for:
- 3–4 days in the refrigerator
Moong sprouts tend to last a little longer than chickpea sprouts. These are perfect for high-protein vegetarian meal prep.
Before Using
- If the sprouts have been stored for a few days, give them a quick rinse with cold water before using.
- If they develop a strong sour smell or slimy texture, it’s best to discard them.

Easy Ways to Eat Sprouts
Growing up, we didn’t eat sprouts just because they were healthy. We ate them because they were delicious. Once you know how to make sprouts at home, you’ll start adding them to everything — salads, curries, chaat, and even soups.
Here are a few of my favorite ways to use fresh homemade sprouts.
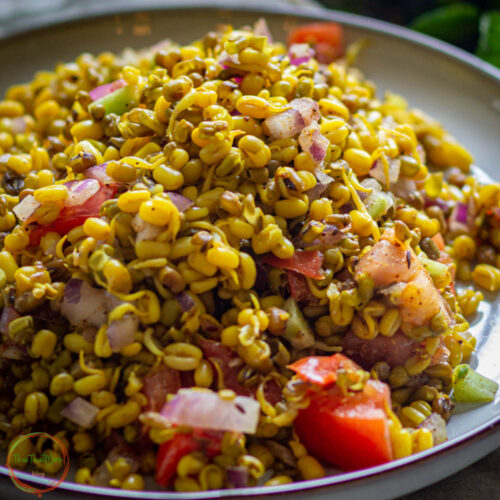
Sprout Chaat
One of the easiest and most popular ways to eat sprouts is a simple Indian-style sprout chaat.
Just add:
- chopped onions
- tomatoes
- green chilies
- lemon juice
- chaat masala
Instant street-style sprout chaat.
👉 If you have your moong ready, you can follow my steps for this zesty Sprouted Green Lentil Chaat for a protein-packed breakfast.
Misal Pav (The Ultimate Sprouted Bean Curry)
If you love bold flavors, sprouts are the heart of Misal Pav, the famous Maharashtrian street food.
Moth bean sprouts simmer in a spicy curry and are topped with crunchy farsan, onions, and lemon.
👉 You can see how I make it in my misal pav recipe using sprouted moth beans. It's one of the most satisfying ways to use homemade sprouts.
Kala Chana Curry
Sprouted black chickpeas (kala chana) also work beautifully in hearty Indian curries.
Once sprouted, they cook faster and have a deeper flavor compared to regular soaked chickpeas.
👉 Try them in a comforting kala chana curry, which makes a delicious protein-packed meal with roti or rice.
Chole (Chickpea)
Even white chickpea sprouts (kabuli chana) can be used in curries or salads. Sprouting them first makes them slightly easier to digest and adds extra nutrition.
👉 Use them in a classic chole curry (Punjabi chickpea curry) for a rich, flavorful dish. Or if you prefer Salad, then do try Indian Chickpea Salad made with basic ingredients.
Add Sprouts to Dal for Extra Protein
Another easy trick is adding sprouts to dal. Sprouted moong beans cook beautifully in soups and lentil dishes, giving them extra texture and nutrition.
👉 Try adding them to my Instant Pot green moong dal for a quick, protein-packed meal.
Nuts & Bolts Sprout Bowl
Make this salad bowl by combining chopped nuts (almonds, cashews, raisins, walnuts, and pistachios) with coconut and sugar.
Frequently Asked Questions
As a rule of thumb, the thicker the skin, the longer the soak.
Moong & Moth: 8–10 hours (overnight is perfect).
Black & White Chickpeas: 12–15 hours. Pro-Tip: If you’re in a cold climate like I am here in Charlotte, use slightly lukewarm (not hot!) filtered water to help the chickpeas "wake up" faster.
If your sprouts—especially the White Chickpeas—smell like strong yeast or old socks, they have likely fermented. This usually happens because of trapped moisture or high kitchen humidity.
The Fix: Rinse them 3 times a day instead of two and ensure they are 100% drained. If the smell is overwhelming or they feel slimy, it’s safer to compost them and start fresh.
Don't panic! If you see tiny, straight white hairs growing off the sprout tail, those are root hairs, not mold. They are perfectly safe and simply mean the sprout is looking for more water. However, if the fuzz looks like a grey, clumped spiderweb, that is mold and you should discard the batch.
Yes! You don't need fancy "sprouting seeds." Most whole (un-split) moong, chana, and moth from the Indian grocery store sprout beautifully. Just ensure they aren't "polished" with oil or irradiated, which can prevent them from growing.
Absolutely not. In fact, for Black and White Chickpeas, I recommend boiling or steaming them for 5 minutes. This softens the bean (saving your teeth!) and removes the "raw" grassy taste while keeping all those amazing sprouted nutrients intact.
Love this high-protein spin on a classic? Don't let your healthy eating streak end here! Join my newsletter for weekly Indian vegetarian meal prep ideas, Air Fryer hacks, and high-protein recipes delivered straight to your inbox. [Join the Chop the Greens Community]
How to Make Sprouts at Home: The Ultimate 4-Way Guide
Video
Ingredients
- 1 cup dried Beans (moong beans, moth beans, kala chana, or kabuli chana)
- Water for soaking and rinsing
Equipment
Method
Step 1: Soak the Beans
- Place the dried beans in a bowl and cover with plenty of water.Soak for:Moong beans or moth beans: 8 hoursKala chana or kabuli chana: 12–15 hours


Step 2: Drain and Rinse
- After soaking, drain the water completely and rinse the beans well with fresh water.Make sure the beans are damp but not sitting in water.
Step 3: Prepare for Sprouting
- Transfer the soaked beans to a bowl or mason jar or sprouting conatiner.Place transfer the beans in a strainer or mesh sieve placed over a bowl. Cover with a mesh lid, cloth, or loose lid so air can circulate.Keep the jar slightly tilted so any extra water can drain out.
Step 4: Keep in a Warm Place
- Place the jar in a warm spot in your kitchen.If your kitchen is cold, you can use:the oven light method: Place your jar in the oven (with the oven OFF). Turn on only the oven light. That tiny bulb creates a warm environment (around 75-80°F/25 °C) that is perfect for germination.the Instant Pot yogurt setting: Place your soaked and drained beans in a bowl inside the IP.Close the lid (vent-to-venting).Press Yogurt (Low setting) for 8-12 hours. It creates a warm, stable environment that encourages fast sprouting.
Step 5: Rinse Daily
- Rinse the beans once or twice a day, then drain them well.Within 24–48 hours, you will see small white sprout tails forming.
Step 6: Store the Sprouts
- Once the sprouts reach the desired length, transfer them to an airtight container and store in the refrigerator.Homemade sprouts stay fresh for 3–4 days.
Notes
💡 Pro-Tips for Sprouting Success
- Timing your Harvest: Not sure if your beans are ready? Check my guide on How Long Do Sprouts Take to Grow? for the ideal tail length for each variety.
- Winter Sprouting: If your kitchen is chilly and your beans aren't "waking up," use my Oven Light or Instant Pot hacks to speed things up safely.
- A Note on Texture: Sprouted chickpeas can be quite firm. If you find them too tough, see my tips in "Should You Eat Sprouted Chickpeas Raw?" on how to blanch or steam them.
- Avoiding the "Smell": If your sprouts smell sour or feel slimy, don't panic. Visit the Common Mistakes and Troubleshooting sections to see if your batch can be saved.
- Meal Prep & Freshness: To keep your sprouts crunchy for up to a week, follow my specific Storage & Reheating instructions.
- Serving Ideas: From Chaat to Misal Pav, I’ve shared my favorite Easy Ways to Eat Sprouts to help you get more protein into your daily meals.
- Still have questions? Check out the FAQs for answers on "white fuzz," store-bought beans, and more.


Jiah says
I always thought of trying to make sprouts at home, but I don't know how. Thanks for sharing this and I'll try to make it now at home.